Multi-Part Sculpts: Too Much Work?
20 april 2020
“I choose a lazy person to do a hard job. Because a lazy person will find an easy way to do it.” ~ Bill Gates
I am a very lazy person. I’d rather hurt myself carrying four bags of groceries than to walk two times, or I can spend an afternoon calculating what way would cost me the least effort when it could have been finished so much earlier if I just picked either way. This searching for the path of least resistance still haunts me, even with 3d printing. What is more work (and as a second criteria; wat looks better)? Printing a multiple part sculpt or printing it as one whole?
Printing multi-part prints means you can easily reposition the parts and have as few supports as possible, but you need to make the pieces fit precisely, and you need to fill up the seams. On the other hand, a whole part sculpt doesn’t need the fitting and seam-repairing, but might have more scarring from the supports. I decided I wanted to find it out for myself, so I set out to print one sculpt as multi-part and one. But first I needed a sculpt. Lucky for me, an opportunity opened up.
As a long time follower of Danny Herrero’s YouTube channel and a very satisfied backer of his first Kickstarter campaign, I didn’t hesitate to pledge his second campaign: The Lost Adventures. I was especially interested in the extra bosses that came available and could be voted in. I had my mind set on this one boss that I liked above all the others. The Hill Giant by David Whitaker. I like to use Giants, but since most monster art depicts Hill Giants as dumb hillbillies (yes, I blame the pun), they never felt very attractive to use as a threatening monster. Que David, with his excellent sculpt, who made me fall in love with Hill Giants again. So, when the sculpt was released around the time that I was looking for this project, I knew which miniature I would pick.

The Process
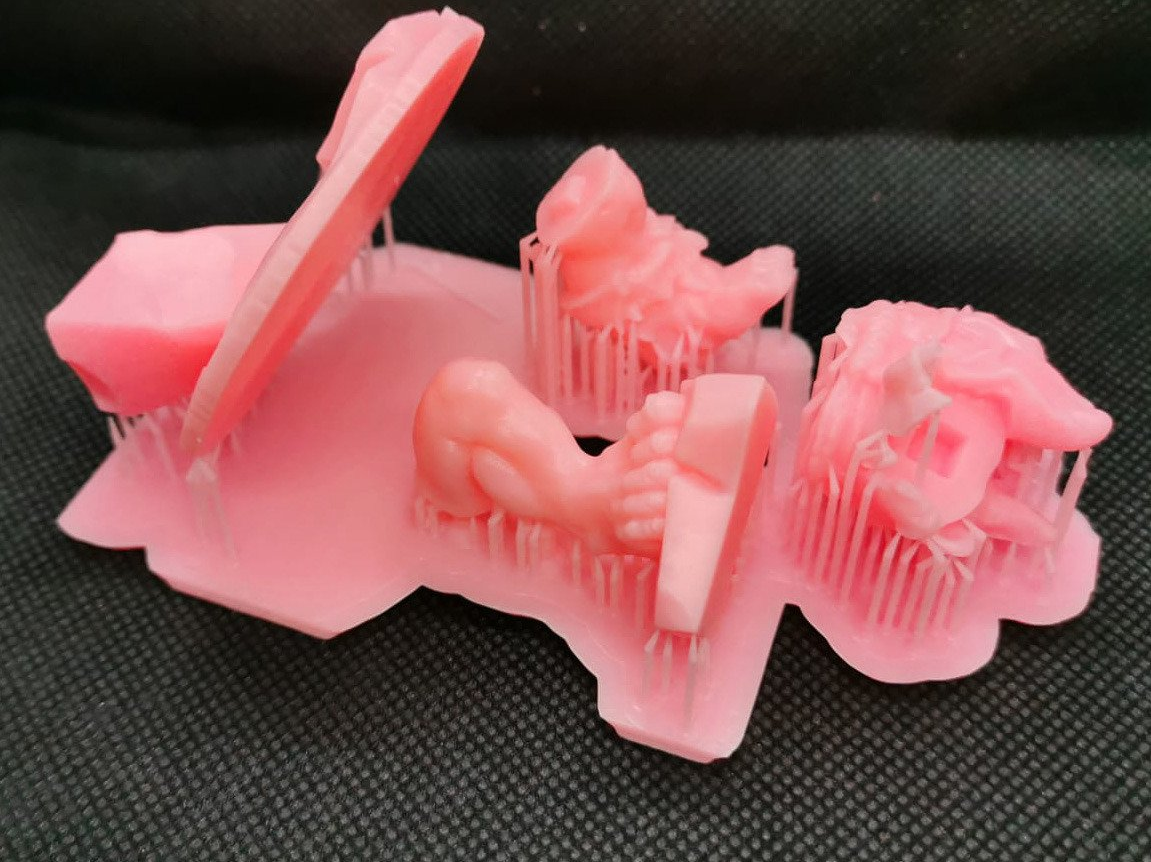
I like the Plant-based resin for two reasons; 1.) It is made from soybeans and as a vegan (yep, couldn’t not mention it) I can’t resist soy. But more importantly 2.) I am convinced that the odour during printing is far less pungent. Even though my printers have their own room in the house, it’s still IN the house, so less smell is better. The 0.05mm layer height is something I would normally not choose for miniatures I want to paint, but as I needed to print three buildplates (two for the multi-part print and one for the whole print) between my orders, I chose to do it as quickly as possible. It still took 29 hours, but the result was great.
As expected from the start, I could keep the supports of the multi-part to a minimum, and the whole part was covered in them. So now the tedious work of removing the supports, sanding, gluing, assembling, etc. started. Even though the clean-up of the multi-part sculpt was easy, the assembly was a lot more work. Small imperfections that can form when various parts are differently oriented, supports that have merged with the sculpt inside the connector holes made it so that a lot of sanding was still necessary. The brittleness from this resin also made it difficult to connect the parts without breaking the more vulnerable sections. Gaps, some more visible than others, were unpreventable. The whole sculpt needed a lot of sanding and it was more difficult to remove certain supports that were used in small, covered, areas. It took some time, but I felt less likely to damage the sculpt.
The Results
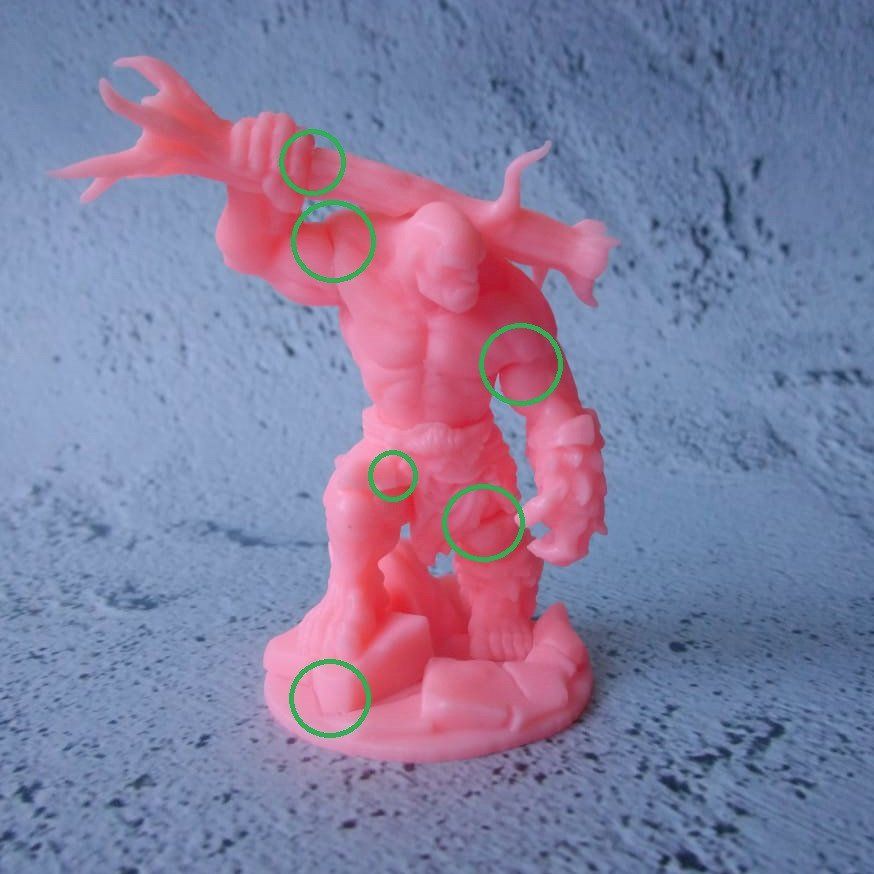
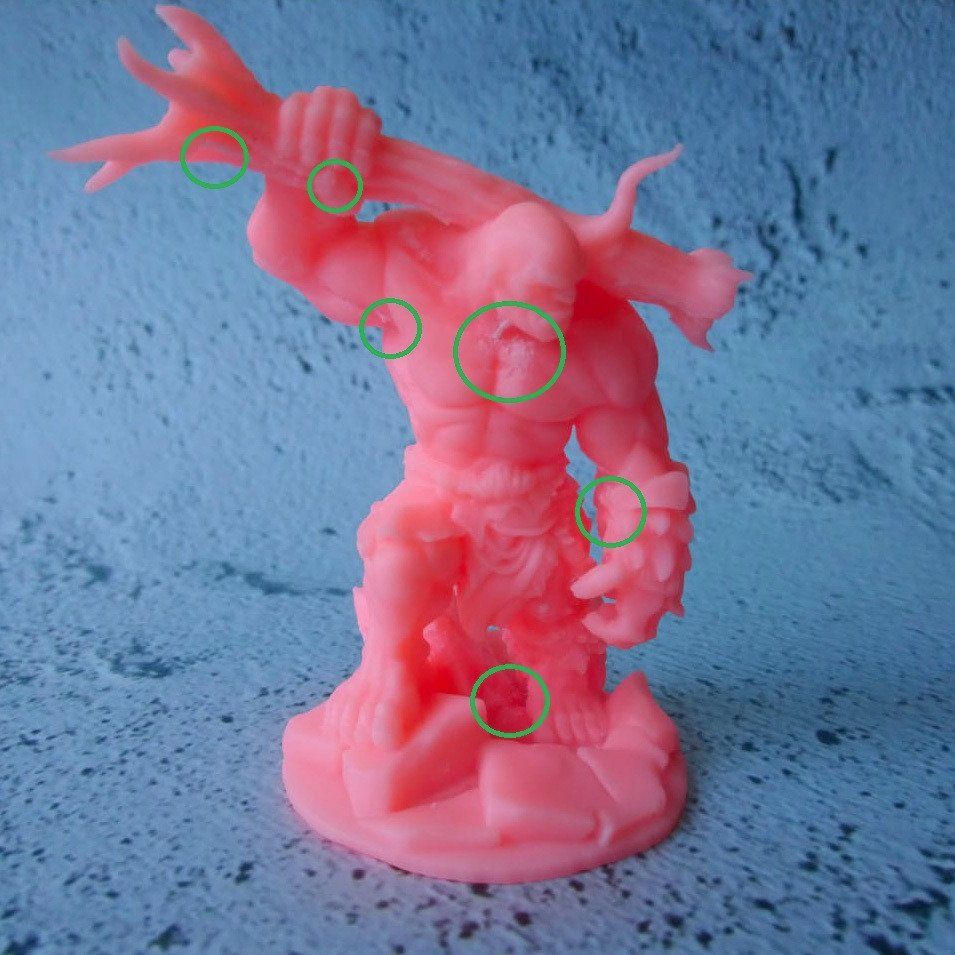
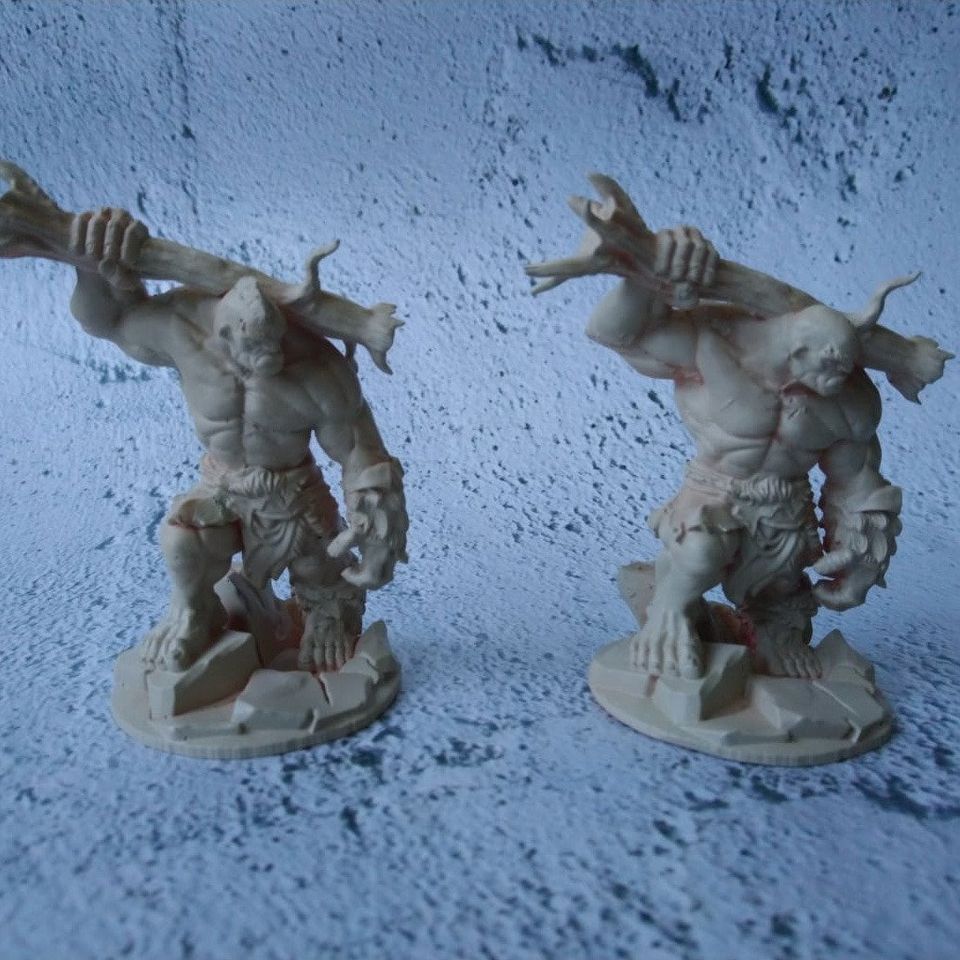
As you can see on the pictures above both prints have some damage, either gaps for the multi-part print, or scarring from the supports on the whole print. The damage on the whole print was minimal and would be barely visible after a priming layer, so this print was finished. The gaps of multi-part print, however, needed to be filled up. Luckily, I always have some Green Stuff laying around. While this is extra work, it really makes everything look better. When painting, these kinds of gaps become really noticeable. A second benefit of using Green Stuff is that you can enhance a model, give it some extra details. In this case I had some Green Stuff left over and decided that the two sculps could use something to easily differentiate them. So how about an easy Mohawk that makes this sculpt even more badass?
Priming and Finishing Touches
Now both prints are ready to be primed. That’s the moment we can see the real difference. So let’s compare the two prints based on what matters most; how do they look?
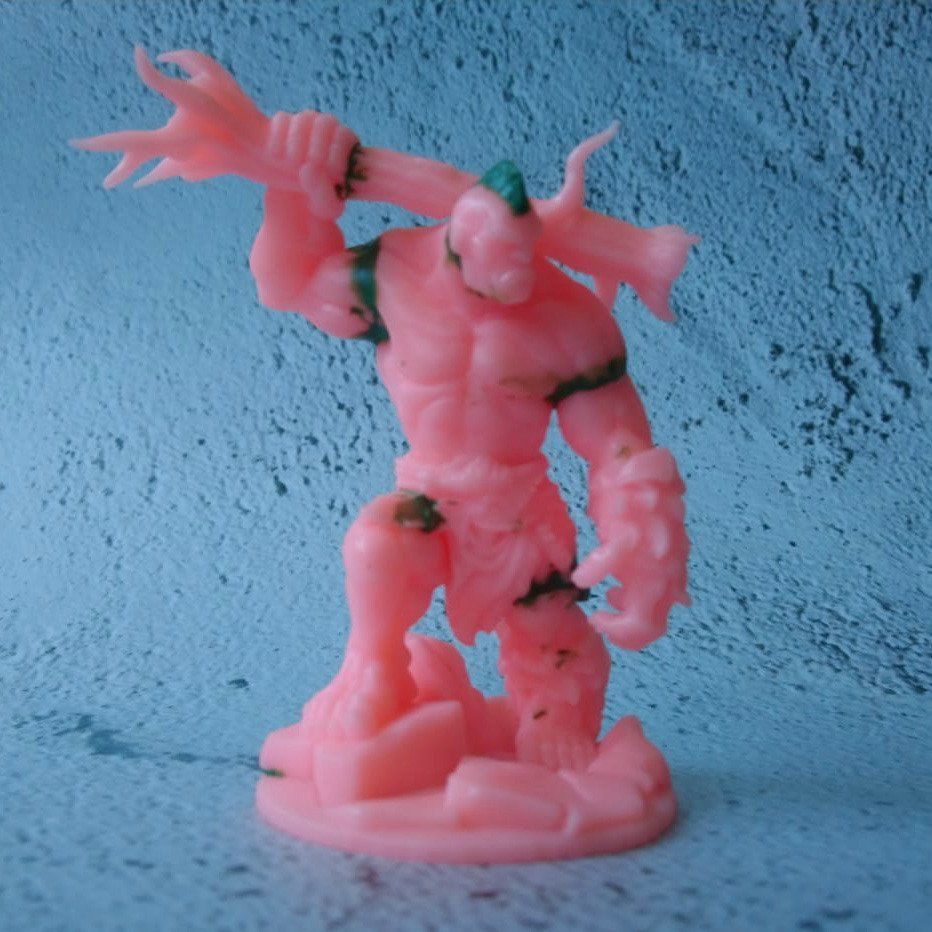
After priming, when the gaps are close to invisible the biggest difference is the scarring from supports. This is most prominent with the whole part print. Many of those imperfections might be removed with even more sanding and filling up deep scars, but that would have meant it would take as much time as the multi-part print. So I compare them as they are now and the multi-part sculpt just looks cleaner and smoother. As you can see below.
Conclusion
How about timewise? The multi-part print needed more time to print, as the parts needed to be spaced over two build plates. After that, it took less time to remove the supports compared to the whole piece of print. However, the repair of the gaps added some extra time, but to be fair, less so than the additional inconvenient supports all over the whole print.
In conclusion, although the multi-part print took more time in the printer, the aftercare process, the part that has me (and you) doing more work, took less time than the whole part print. On top of that, the multi-part print looks better and cleaner (and more badass thanks to added features). So even though it seems like more work, it is the least effort.
In short:
Multi-Part Print
+ Fewer supports
+ Less scarring
+ Less aftercare
+ Looks better
- More print time
- Need extra materials
+ Less scarring
+ Less aftercare
+ Looks better
- More print time
- Need extra materials
Whole-part Print
+ Less print time
+ No need for additional material
- More supports
- More Scarring
- More aftercare
Sculpt: Ogi Skullcrusher, Hill Giant Tyrant by David Whitaker, Tytan Troll Miniatures from ‘The Lost Adventures’ Kickstarter
by Danny Herrero